|
Materials:
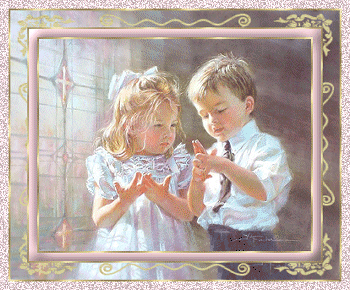
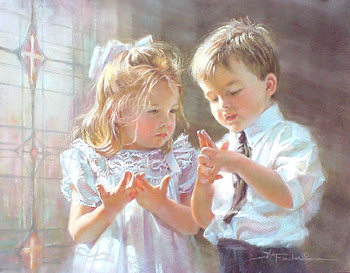
The picture
and
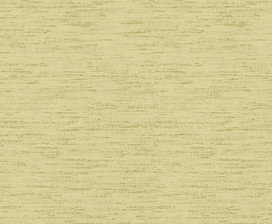
Chenille
pattern
Masker CRLDeco,
place this in the folder Masks
Goldpattern,
place this in the folder Patterns.
Step
1:
Open the picture and the pattern Chenille
Duplicate the picture by Shift + D
Put 1 of the 2 pictures aside and go further with the other
one.
Add a 2 pixel border in a color that's not in the picture.
(Image - add borders - 2 pixels - symmetric)
Select the border with your magic wand tool and flood fill
with the gold pattern.
(Did you check contiguous?)
Add a border of 10 pixels and flood fill with a soft color
from the picture.
Select the border with your magic wand tool.
Effects - 3D effects - Inner bevel:
Round (=2) Width 5/ 80-8-10-20-315-40-36
Again add a border of 2 pixels with the gold pattern.
Selections - select none
Step 2
Add borders 20 pixels and select with the magic wand tool.
Copy the picture (right click and copy) that you've put
aside and paste these INTO selection. (right click and paste
into)
Let the selection where it is.
Layers - new raster layer
Flood fill the new raster layer with the pattern Chenille.
You've opened Chenille, so it will be automatically in the
menu of the patterns.
Layers - Load /save mask - Load mask from disk - Go tothe
folder where you put the mask - CRLDeco
Layers - merge - merge group.
Selections - select none
Step 3
Add a 2 pixel border in a color that's not in the picture.
Select the border with your magic wand tool and flood fill
with the gold pattern.
Add a border of 10 pixels and flood fill with the same soft
color as the first 10 pixel border.
Add a 2 pixel border again with the gold pattern.
Image - Resize - width 350 pixels - bicubic
Check aspect ratio and resize all layers.
When it's OK you have only a background layer in the layer
palette
If not, merge all layers.
Duplicate that one layer in the layer palette twice
(right click in layer palette and choose duplicate)
Lock the upper two (click on the eye behind the layer) and
select the first one.
Select the outher pink border (I've got pink, you can have a
different color) with your magic wand.
Adjust - Add/ remove noise - Add noise - Uniform 40
-monochrome
Lock the first layer,open layer 2 and select it by clicking
on the layer.
Adjust - Add/ remove noise - Add noise - Gaussian 40 -
monochrome
Lock layer 2 and open and select the upper layer.
Adjust - Add/ remove noise - Add noise - Uniform 60
-monochrome
Selections - select none
Step 4
Open all 3 layers.(Click on the eyes)
Select the first one.
File - Save as - Animation Shop (*psp, 2th from above) -
Name it tut 22 for example
Look carefully whére you save it!
Go to Animation shop.
Open the Wizard animation (under file)
Select:
Same size (next)
Transparent (next)
Center and canvas color (next)
Yes, repeat and 10 seconds (next)
Add image and search for tut 22
File type is Paint Shop Pro image!!
Open the image tut 22 (next)
Finish
By clicking here
 you can see your animation
File - save as- choose a name and select a folder.
|


